


How to Take Tasteful Intimate Photos: A Safe and Confident Guide
Stack & Save: Extra 15% with Jissbon15
Jissbon15
Creating intimate photos for yourself or a trusted partner can boost confidence and self-expression. This guide covers practical techniques for flattering angles, lighting, composition, and—most importantly—protecting your privacy and security.
Whether you're exploring self-portraiture or creating images for a partner, you'll learn how to approach this safely and thoughtfully.
Who This Guide Helps
This resource serves adults looking to explore intimate photography responsibly:
- Individuals building body confidence through self-portraiture
- Long-distance partners maintaining visual connection
- People exploring self-expression and artistic photography
- Couples enhancing intimacy through shared visual experiences
- Anyone curious about creating flattering images privately
- Those recovering confidence after body changes or relationships
The focus is safety, consent, and creating images you feel genuinely good about.
Understanding Digital Safety First

Before discussing photography techniques, address security fundamentals. Digital images carry risks that require proactive protection.
Privacy Protection Essentials
Remove identifying information:
- No visible faces, tattoos, or unique birthmarks
- Hide background details (photos, artwork, distinctive furniture)
- Remove jewelry or accessories people recognize as yours
- Check reflections in mirrors, windows, or shiny surfaces
Secure your devices:
- Enable biometric locks (fingerprint, face recognition)
- Use strong, unique passwords for photo storage
- Turn off automatic cloud backup for sensitive folders
- Enable two-factor authentication on all accounts
Control metadata:
- Disable GPS location tracking in camera settings
- Use apps that strip EXIF data before sharing
- Never share original files—always send copies
- Consider screenshot-only sharing (reduces metadata)
Choose secure sharing methods:
- Avoid standard text messages (not encrypted)
- Use encrypted messaging apps (Signal, WhatsApp with disappearing messages)
- Never post on social media, even "private" accounts
- Consider apps designed for temporary image viewing
Understanding Digital Permanence
Once you send an image digitally, you lose complete control over it. Consider these realities:
Screenshots exist. Recipients can capture images before they disappear. "Temporary" viewing doesn't guarantee deletion.
Cloud services save everything. Most phones automatically back up photos to cloud storage. Check your settings carefully.
Deleted doesn't mean gone. Digital forensics can recover "deleted" files from devices. Only physical destruction of storage media ensures permanent deletion.
Revenge sharing happens. Even trusted partners may become ex-partners. Relationships end unexpectedly. Protect yourself by minimizing identifiable features.
Legal protections vary. While many regions criminalize non-consensual intimate image sharing, enforcement remains inconsistent and prosecution doesn't erase images already circulated.
Essential Equipment and Setup
You don't need professional gear—just thoughtful preparation.
What You Actually Need
|
Item |
Purpose |
Budget Option |
Premium Option |
|
Camera |
Image capture |
Smartphone (8MP+) |
DSLR or mirrorless |
|
Lighting |
Flattering illumination |
Window + lamp |
Ring light ($30-50) |
|
Timer/Remote |
Self-portraits |
Phone timer (free) |
Bluetooth remote ($15-25) |
|
Tripod |
Stable positioning |
Stack of books |
Phone tripod ($20-40) |
|
Editing |
Enhancement |
Free phone apps |
Lightroom ($10/month) |
Smartphone cameras work excellently. Modern phone cameras (iPhone 11+, recent Android flagships) produce professional-quality images with proper lighting. Don't feel pressured to buy expensive equipment.
Natural light beats artificial. Indirect sunlight from windows creates soft, flattering illumination. Harsh overhead lights create unflattering shadows.
Stability matters more than sharpness. Blurry images from camera shake look unprofessional. Use a tripod, stable surface, or timer to avoid this.
Creating Your Space
Choose the right room:
- Natural light source (window with sheer curtains)
- Private, lockable door
- Neutral or attractive background
- Comfortable temperature
- Full-length mirror (optional but helpful)
Prepare the environment:
- Clean and declutter visible areas
- Remove identifying items from background
- Test lighting at different times of day
- Adjust room temperature (you'll remove clothing)
- Have a robe or comfortable clothing nearby
Set up your equipment:
- Position phone/camera at various heights (experiment)
- Test timer duration (usually 3-10 seconds works)
- Ensure device is stable and won't fall
- Take test shots to check framing
- Keep charger nearby for extended sessions
Lighting Techniques That Flatter Everyone

Lighting creates mood and minimizes perceived imperfections.
Natural Light Approaches
Golden hour (early morning/late afternoon):
- Warm, soft light enhances skin tones
- Creates gentle shadows that define features
- Reduces appearance of texture or blemishes
- Position yourself facing or beside the window
- Use sheer curtains to diffuse direct sunlight
Overcast day lighting:
- Cloudy skies act as giant softboxes
- Even illumination without harsh shadows
- Works well for any skin tone
- Position near large windows
- No additional diffusion needed
Window-based side lighting:
- Creates dramatic contouring
- One side illuminated, other in shadow
- Emphasizes curves and muscle definition
- Stand perpendicular to window
- Adjust distance to control shadow intensity
Artificial Light Solutions
Ring lights ($30-50):
- Even, shadowless illumination
- Creates attractive catchlights in eyes (if face included)
- Adjustable brightness and color temperature
- Position directly in front for even lighting
- Works well for close-up shots
Table lamp modification:
- Remove shade for softer light
- Point at white wall to bounce/diffuse
- Creates gentle, indirect lighting
- Use warm bulbs (2700-3000K) for flattering tones
- Position at 45-degree angle
String lights:
- Creates romantic, soft ambiance
- Provides subtle background interest
- Too dim for sole light source
- Combine with window light
- Adds warm accent lighting
Lighting Mistakes to Avoid
Overhead bathroom lighting: Creates unflattering shadows under eyes, nose, and chin. Makes everyone look tired and harsh.
Direct flash: Washes out skin tones, creates flat images, and eliminates dimension. Never use direct on-camera flash.
Mixed color temperatures: Combining cool (blue) and warm (yellow) light creates odd skin tones. Choose one temperature and stick with it.
Backlighting only: Positioning light source behind you creates silhouettes. Works for specific artistic effects but not for detailed images.
Posing and Angles That Work
Body positioning dramatically affects how images read.
Universal Flattering Angles
Camera position matters:
- Slightly above eye level slims face and body
- Shooting from below emphasizes height but can add unflattering perspective
- Straight-on works for confidence and directness
- Experiment with heights from ground level to above head
The S-curve technique:
- Shift weight to one leg
- Pop the opposite hip outward
- Create natural curve through torso
- Relax shoulders down and back
- This creates visual interest and definition
Hand placement:
- On hips creates confidence and defines waistline
- Through hair suggests sensuality
- Touching face draws attention upward
- Avoid letting arms hang straight (creates unflattering angles)
- Bend elbows slightly to create space and definition
Leg positioning:
- One leg bent, one straight creates shape
- Crossed legs at ankle slims lower body
- One foot forward adds depth
- Avoid knees pointing directly at camera (foreshortening)
Body-Specific Approaches
Emphasizing curves:
- Three-quarter angles show dimension
- Arching back slightly accentuates natural curves
- Side-lying positions highlight hip-to-waist ratio
- Use shadows to create additional contouring
Creating athletic look:
- Straight-on angles show symmetry
- Flexing muscles subtly (don't overdo)
- Lighting from side defines muscle separation
- Standing positions emphasize height and strength
Minimizing specific areas:
- Angle away from camera to slim
- Use selective cropping
- Employ shadows strategically
- Focus on features you love rather than hiding others
What to Wear (or Not)
Lingerie considerations:
- Well-fitting pieces look better than elaborate designs
- Solid colors photograph better than busy patterns
- Simple lines create cleaner images
- Comfort matters—you'll look tense if uncomfortable
Partial covering techniques:
- Sheets or fabric create artistic concealment
- Strategic hand placement
- Shadows and lighting for natural coverage
- Hair positioning (if long enough)
Implied rather than explicit:
- Shoulder-and-up shots suggest without showing
- Selective cropping maintains mystery
- Focus on curves rather than explicit anatomy
- Often more visually interesting than fully explicit images
Composition and Framing
Technical photography principles apply to intimate images just like any other genre.
Rule of Thirds
Imagine your frame divided into nine equal sections by two horizontal and two vertical lines. Position key elements along these lines or at intersections rather than dead center.
- Creates more dynamic, professional-looking images
- Guides viewer's eye naturally through composition
- Prevents static, boring framing
- Most camera apps show grid overlay to help
Using Negative Space
Empty space around your subject creates visual breathing room and draws focus.
- Don't fill entire frame with your body
- Allow background space on one side
- Creates sense of context and environment
- Prevents cluttered, claustrophobic feeling
Leading Lines
Use architectural elements or body lines to guide viewer's eye:
- Bedsheet edges leading toward body
- Arm positioned to direct attention
- Leg lines creating visual flow
- Window frames or furniture edges
Cropping Creatively
Strategic cropping focuses attention:
- Crop at natural joints (wrists, ankles) not mid-limb
- Chest-and-up shots feel intimate without explicit
- Partial face (lips, jawline) maintains some anonymity
- Close-ups of curves or specific features create artistic effect
Post-Processing and Enhancement
Editing refines images without drastically altering reality.
Free Editing Apps That Work Well
Snapseed (iOS/Android):
- Professional-grade tools
- Selective adjustment brush
- Healing tool removes blemishes
- Portrait filter softens skin naturally
VSCO (iOS/Android):
- Film-inspired presets
- Subtle enhancement rather than obvious filters
- Grain and fade tools for artistic effect
- Easy skin tone adjustment
Lightroom Mobile (iOS/Android):
- Professional desktop tools in phone app
- Precise color and exposure control
- Selective adjustments to specific areas
- Free version includes essential features
Editing Techniques to Use Sparingly
Skin smoothing:
- Remove temporary blemishes (acceptable)
- Subtle texture reduction (fine)
- Complete skin blur (looks artificial)
- Keep editing realistic—you want to recognize yourself
Color correction:
- Adjust white balance for accurate skin tones
- Warm images slightly for flattering glow
- Enhance contrast moderately
- Avoid extreme saturation (creates unnatural colors)
Brightness and shadow:
- Brighten slightly to reduce harsh shadows
- Increase shadow detail without making image flat
- Don't overexpose highlights
- Maintain dynamic range
Sharpening:
- Apply minimal sharpening to eyes or key features
- Over-sharpening emphasizes skin texture
- Use selectively rather than globally
- Zoom in to check for halos (sign of too much)
What to Avoid in Editing
Heavy Instagram filters: Create obviously processed look that dates images quickly. Stick with subtle adjustments.
Body reshaping tools: Slimming or enlarging specific areas creates unrealistic expectations and looks distorted. Accept your natural shape.
Extreme contrast: Makes skin look harsh and emphasizes every texture. Keep adjustments moderate.
Face-tuning apps: If you're removing identifying features anyway, facial smoothing becomes unnecessary and creates uncanny valley effect.
Secure Storage and Sharing

Technical photography skills mean nothing if images end up in wrong hands.
Storage Best Practices
Create separate, secured folder:
- Use phone's built-in "hidden" or "private" folders
- Third-party vault apps with password protection
- Never store in main camera roll
- Disable cloud sync for this specific folder
Consider physical storage:
- Transfer to password-protected external drive
- Remove from phone after transferring
- Store drive in secure location
- Provides complete control over access
Regular security audits:
- Monthly check of what's stored where
- Delete images you no longer want to keep
- Verify cloud services aren't backing up automatically
- Review app permissions for photo access
Sharing Safely (If You Choose)
Before sending:
- Triple-check for identifying features
- Verify recipient is who they claim
- Consider whether relationship warrants this trust
- Remember that trust can break unexpectedly
Use encrypted platforms only:
- Signal (disappearing messages feature)
- Telegram (secret chats with self-destruct)
- Wickr (designed for secure messaging)
- Never use SMS or unencrypted messaging
Set expectations clearly:
- "These are for your eyes only"
- "Please don't save or screenshot"
- "Delete after viewing"
- Document consent and boundaries
If relationship ends:
- Request deletion immediately
- Follow up to confirm deletion
- Know your legal rights if images are shared
- Document all communications about image deletion
Building Confidence Throughout the Process
Creating intimate images should feel empowering, not stressful.
Start Slowly
Begin with clothed practice:
- Fully dressed photos to learn angles and lighting
- Build comfort with camera and poses
- Review what works before progressing
- No pressure to create explicit content immediately
Take breaks frequently:
- Long sessions become tedious and forced
- Fresh perspective after rest reveals better angles
- Avoid exhaustion leading to unflattering images
- Quality over quantity always
Solo sessions first:
- Build confidence without partner pressure
- Learn your preferred angles privately
- Delete liberally without judgment
- Progress at your own pace
Reframing Negative Thoughts
"I don't look good enough": Reality: You're comparing yourself to professionally shot, heavily edited images. Your natural body is beautiful and deserves celebration.
"What if someone sees these?": Reality: Follow security protocols carefully. Digital risk exists, but proper precautions dramatically reduce exposure.
"This feels silly or awkward": Reality: Everything feels awkward initially. Photographers and models practice extensively. Give yourself permission to learn.
"My partner won't find these attractive": Reality: Partners who care about you find you attractive because you're you. Confidence matters more than perfection.
Creating for Yourself First
The healthiest approach centers your own enjoyment and confidence rather than external validation.
- Take images that make YOU feel good
- Choose poses that feel comfortable and authentic
- Delete anything that doesn't bring joy or confidence
- Share only if it enhances connection, never from obligation
When Not to Create or Share Images
Some situations warrant pausing or reconsidering entirely.
Relationship pressure: If a partner demands, pressures, or conditions affection on receiving images—that's coercion. Healthy partners respect boundaries without pressure.
Under influence: Never create intimate images while intoxicated, medicated, or not fully in control of decision-making.
New relationships: Consider waiting until trust is thoroughly established. Early-stage relationships often don't last, and images remain forever.
Feeling uncertain: If you have doubts, wait. You can always create images later. You can't unsend them once shared.
Legal considerations: Research laws in your jurisdiction regarding intimate images. Some regions have complex regulations about creation, possession, and sharing.
Frequently Asked Questions
What if someone threatens to share my images?
This is illegal in most jurisdictions under "revenge porn" laws. Document all threats, cease communication, and immediately consult with law enforcement or a legal professional specializing in cyber harassment. Many regions have victim support organizations that assist with emergency image removal and legal navigation.
How do I permanently delete images?
On phones: delete from photos, then empty "recently deleted" folder. On computers: delete, empty recycling bin, then use secure deletion software that overwrites data. For complete security, physically destroy storage devices. Remember that cloud backups and backups to computers may still contain copies.
Can editing remove identifying features effectively?
Partially. Blur tools can obscure faces and tattoos, but forensic analysis can sometimes reverse blur effects. Complete cropping works better than blur. However, other identifiers (background details, metadata, body characteristics) may still allow identification. Assume identification is possible and plan accordingly.
Is it normal to feel vulnerable or anxious?
Absolutely. Creating intimate images involves risk and vulnerability. These feelings indicate healthy self-awareness rather than something wrong with you. Don't let anyone pressure you into dismissing reasonable concerns. If anxiety outweighs enjoyment, it's okay to stop.
Should couples take photos together or separately?
Separate creation allows individual control over angles, lighting, and final image selection. Together can feel more intimate but requires vulnerability about less-flattering attempts. Many couples start separately then progress to shared sessions. Choose whatever feels most comfortable for your relationship dynamic.
How do professional photographers make subjects look so good?
Professional equipment, years of practice, controlled studio lighting, professional hair and makeup, extensive editing, and selecting the best from hundreds of shots. They also work with models who've trained in posing. Don't compare your casual self-portraits to professional productions. Different contexts entirely.
Final Thoughts on Safe Self-Expression
Intimate photography can build confidence, enhance connection, and celebrate your body when approached thoughtfully. Prioritize your safety, comfort, and consent above everything else.
Start slowly, focus on security first, and create images that genuinely make you feel good about yourself. You control every aspect—what you create, what you keep, what you share, and with whom.
If you're exploring confidence and self-expression, remember that Jissbon supports your journey toward comfort with your body and sexuality through education and body-safe products.


Looking for something else?

Where to Hide Sex Toys: 15 Discreet Storage Ideas
LEARN MORE
Playing with Vibrator: Complete Solo Guide & Tips
LEARN MORE
Sex Positions from Behind: 8 Beyond Doggy Style
LEARN MORE
What Does a Vulva Taste Like? Facts & Myths Explained
LEARN MORELooking for something else?

Straddle Sex Position: 7 Variations & Tips
LEARN MORE
Mistress Slave Relationship in BDSM: Complete Guide
LEARN MORE
Sensual Domination: Guide to Affectionate Power Play
LEARN MOREYou may also like
20% off

20% off

20% off

20% off

20% off

20% off

Further reading
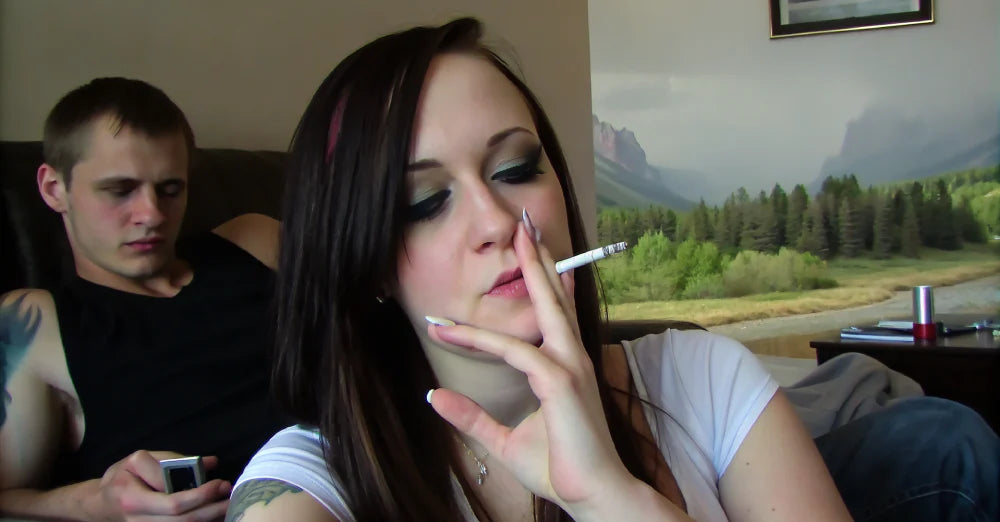
Understanding Smoking Fetish: The Erotic Appeal of Cigarettes

Deep Penetration Orgasm: A-Spot, G-Spot & Techniques
Vibrator Bondage: BDSM Guide to Restrained Pleasure