


Self Bondage Ideas: Safe Solo BDSM Tips & Techniques
Stack & Save: Extra 15% with Jissbon15
Jissbon15
Curious about self bondage ideas that feel intense and responsible? You’re in the right place. This guide covers safety basics, gear, self bondage techniques, step‑by‑step setups, and how to create self bondage positions that satisfy the “stuck and turned‑on” fantasy without gambling on your wellbeing. We’ll keep brand mentions light, lean on trusted resources, and include a clear FAQ at the end.
Quick note: Solo restraint is inherently riskier than partnered bondage because no one else is there to help. You’ll see this guide repeat the same core message: layer in redundant releases, avoid anything that restricts breathing, and keep a phone and shears within reach. Mainstream sex‑health sources and kink safety guides stress consent, safewords, and sober planning for any bondage—those rules matter even more in selfbondage.
Safety First (No Exceptions)
1) Consent frameworks still apply—even solo.
BDSM isn’t abuse because it’s consensual, negotiated, and risk‑aware. The kink community often uses SSC (Safe, Sane, Consensual) or RACK (Risk‑Aware Consensual Kink) to frame choices; both emphasize informed, ongoing consent and clear stop conditions. For planning, borrow a Yes/No/Maybe checklist and write your own limits for solo play (how long, which ties, what you’ll avoid).
2) Absolutely no self breath play or neck restraint.
There’s no “safe” version of auto‑asphyxiation. Breath play carries serious injury and fatality risk; even partnered articles label it high‑risk. Alone, it’s a hard no. Avoid anything that compresses your neck or chest, and avoid positions where breathing can be compromised (e.g., face‑down hogties).
3) Understand nerves and circulation.
Nerve compression is a leading rope risk (especially radial nerve around upper forearm/wrist). Tingling, numbness, or “pins and needles” are stop signs. Learn common pinch zones, avoid tight ties over joints, and keep sessions short while you learn your body. There’s peer‑reviewed documentation of radial neuropathy during rope bondage—respect that risk.
4) Redundancy saves you.
Have two releases minimum: (a) EMT safety shears within reach (blunt‑tip trauma scissors designed to cut rope/tape fast), and (b) a secondary, independent release (timer you can cancel, backup key you can reach, or a quick‑release buckle you can pop with one hand). Practice both when you’re calm.
5) Set, test, and time everything.
Self bondage tutorials often mention ice‑timers or delayed key drops. If you experiment with any timed release, test it repeatedly while unbound, then while lightly bound, before committing. Keep sessions short at first and build gradually; “start easy and take it slow” is consistent mainstream advice.
6) Keep it sober and situationally aware.
Plan when you’re rested, hydrated, and clear‑headed; pad the floor; lock interruptions out; and charge your phone—screen unlocked, emergency numbers ready. General bondage guides highlight staying sober and preparing your space before restraints go on.

Gear Basics for Safer Self BDSM
- Velcro cuffs / padded cuffs: Fast to secure, fast to release, low learning curve.
- Bondage tape (not duct tape): Non‑adhesive; sticks to itself, peels off skin easily.
- Soft rope (learn 1–2 non‑cinching ties): Skip hardware‑store paracord; rope educators caution against materials that tighten unpredictably or bite.
- EMT safety shears: Blunt‑tip, rope‑cutting scissors that won’t stab skin. Keep them in your hand before final restraint, then set within easy reach.
- Timers / smart plugs / app timers: If you play with time‑release ideas, you still need a manual escape. Use tech as a bonus layer, not your only plan.
- Anal add‑ons? If you include an anal toy, it must have a flared base (and lots of lube). That’s a universal safety note in medical‑style explainers.
Use these bondage ideas as frameworks you can personalize. Keep ties loose enough to slide a fingertip under, and stop if you feel tingling, numbness, coldness, or sharp pain.
1) The Floor Spread (Quick‑release cuffs)
Lie on a padded floor. Attach Velcro ankle cuffs to sturdy furniture feet (short leads). Do the same for wrist cuffs in front of you, not behind. Place shears next to one hand, test reach, then attach. The floor prevents roll‑offs; Velcro gives you a manual out.
2) Front‑Bind Chair (Seated, low strain)
Sit on a sturdy chair. Cuff ankles to chair legs (loose). Cross wrists in front and secure with bondage tape or a removable buckle. Keep shears on your lap until the last step; practice reaching them with minimal shoulder movement in case arms fatigue.
3) Thigh‑to‑Wrist “Frog” (Mobility‑friendly)
While seated, cuff each wrist to the same‑side thigh with Velcro. You’ll feel pleasantly “held” without compromising breathing or circulation. This setup shines for edging or audio play. Keep all releases in your lap.
4) Weighted‑Blanket Cocoon (No knots)
Lie face‑up. Pull a weighted blanket to chest height; wrap your forearms under it. The weight gives stillness without something to cut through. Add a timer for pacing. Good for beginners who want the feeling of restraint before trying ties.
5) Rope‑Light Chest Harness (Hands free)
If you’re learning rope, practice a simple, loose chest harness you can cut off instantly. No neck wraps; keep it high on the torso and away from armpits to reduce nerve risk. Never suspend yourself; even experienced riggers warn against solo suspension.
6) Tape‑Mitts + Ankle Cuffs (Control, not crush)
Wrap bondage tape around open hands to dull finger dexterity (never around the neck/face), then cuff ankles. This offers “helpless hands” without binding wrists behind your back. Keep shears within elbow’s reach.
7) Bed‑Edge Single‑Ankle Tether (Minimalist)
Loop one ankle cuff to a bed leg with a quick‑release clip; leave the other free. It’s more psychological than physical—and that’s the point. Start here if you’re testing how to self bondage without complex knots.
8) Corner Kneel (Body‑weight restraint)
Kneel facing a wall or corner with a pillow at your knees. Cross wrists in front; loop a soft belt loosely around wrists and the opposite forearm. The wall “holds” you with no hardware. Avoid long holds to keep circulation healthy.
9) Blindfold + Audio + Quick‑Cuffs (Sensory focus)
Use a blindfold and audio domination track. Cuff one wrist to a sturdy headboard loop with a carabiner you can unclip one‑handed; keep shears within your free hand’s reach. Short, powerful scenes—then out.
10) Prostate Pressure + Front Cuffs (Hands‑light)
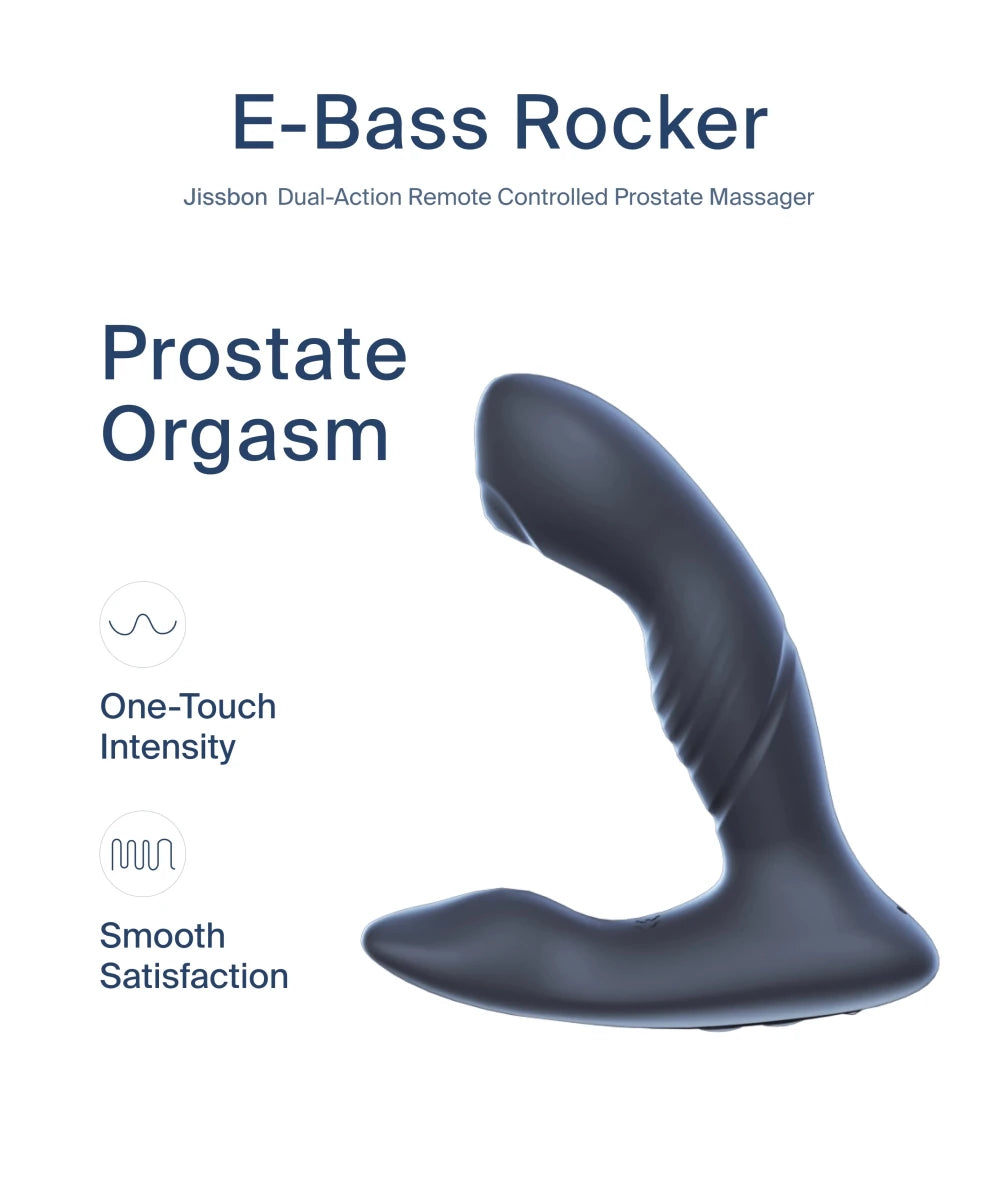
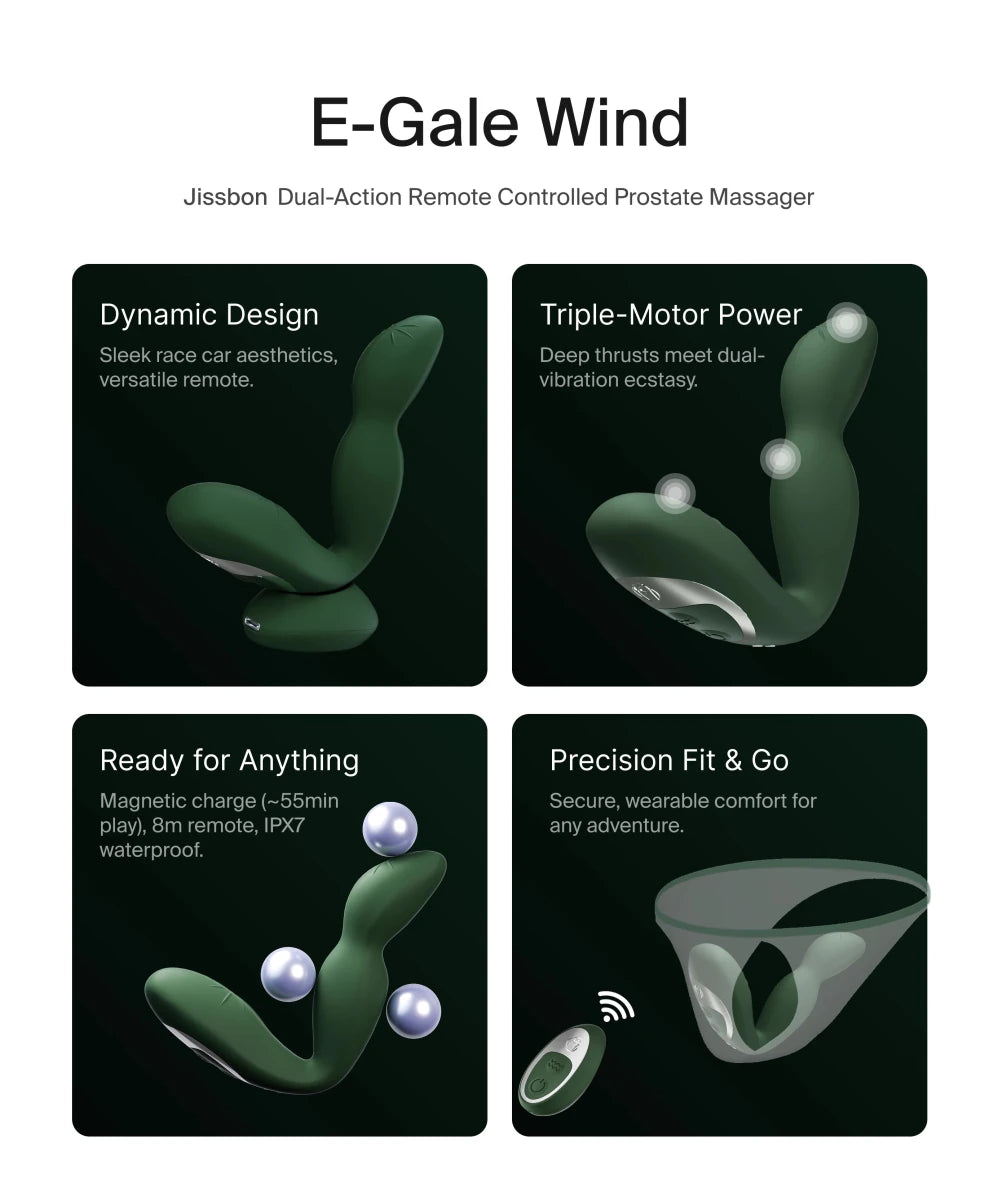
If you enjoy internal pressure, a small flared‑base plug or remote massager can add deep sensation while wrists are secured in front. Keep everything external and avoid positions that press on the belly or chest. Browse prostate massagers; if you like app‑style control, consider a compact remote option like E‑Gale Wind Remote‑Controlled Prostate Massager. (Go slow; lube generously; the base must remain outside.)

How to Self Bondage: A Step‑by‑Step Plan (Your First Scene)
- Set your intent. What do you want to feel—stillness, tease, denial, release? Pick one goal; keep your setup simple. (Competitor overviews echo “choose the feeling first, then build around it.”)
- Prep the room. Pad the floor, clear hazards, set water within reach, silence interruptions, and unlock your phone with emergency numbers visible.
- Lay out escapes. Put EMT shears at your dominant side and a backup release you can reach in one move (spare key, quick‑release clip). Practice both unbound.
- Rehearse the tie. Do it at 50% snugness; note any spots that tingle or numb—those are no‑go zones. Rope safety educators name nerve compression as the big risk; adjust or pick a different bind.
- Timebox the session. Use a countdown timer or app alert. Start short; being tied amplifies heat and fatigue faster than you expect. (General bondage articles advise taking it easy, especially early on.)
- Bind last thing, not first. Toys, audio, lube, tissues, water, lighting—set it all up before you finish the restraint.
- Check circulation every few minutes. Look for color change, coldness, pins‑and‑needles. If anything feels off, stop and cut. Rope‑specific safety lessons emphasize early removal over “toughing it out.”
- End consciously. Remove restraints, hydrate, and stretch gently (wrists/forearms/hips). Nerve‑safety pages suggest moving limbs gradually after being bound.
- Debrief yourself. What tied well? What needs padding or a different angle next time?
Self Bondage Techniques: Releases & Redundancy
- Primary release: Shears in hand until the final step, then within easy reach (not across the room).
- Secondary release: Quick‑release buckle, reachable key, or a tested timer trigger. Ice‑delay key drops are popular, but they require thorough practice in safe conditions—and you still need shears as backup.
- Location safety: Avoid beds/chairs that shift; floor setups are more stable. Community safety intros warn about positional asphyxia risks in face‑down or forward‑bent positions; avoid those solo.
- No suspension solo: It drastically increases nerve/compression risk and offers no margin for error. Rope safety educators and case reports show nerve injuries can occur quickly.
Layering Sensation (Hands‑Light Options)
- Audio domination & blindfolds: Deepen headspace without extra restraint.
- Vibrators or plugs you don’t have to hold: Set on low, then focus on breath and stillness.
- Edging/denial: Build to a 7/10, pause; repeat. Timers can structure this. (Competitor guides pair time releases with edging.)
- Perineum or nipple focus: Non‑genital routes can carry surprising intensity. Neuroscience work shows nipple‑to‑genital sensory overlap in some people—use it.
Health & Risk Notes (Bookmark This)
- Circulation & nerves: Learn warning signs; avoid ties near joints/creases; keep tissue warm. Rope safety courses flag nerves as “the insidious danger”—you may not feel pain before damage.
- Asphyxia & chest pressure: Any constraint that limits breathing is dangerous; don’t wrap chest tightly; avoid face‑down binds. Harm‑reduction pieces reiterate there’s no risk‑free version of choking.
- Aftercare (even solo): Water, warmth, light stretch, and a written note on what to change next time.
- Medical conditions: If you have diabetes (neuropathy), vascular disease, joint issues, or recent surgery, reduce intensity and talk to a clinician first; bondage safety pages explicitly call out these risk factors.
“Self Bondage Videos” & Tutorials: How to Vet What You Watch
Videos can inspire—but they’re not safety manuals. If you watch a self bondage tutorial or browse self bondage videos, check that creators:
- Use safety shears and show reachable releases.
- Avoid neck wraps and face‑down ties.
- Talk about circulation checks and panic plans.
- Link to safety resources (see below) and discourage suspension solo.
For written, safety‑forward reading, see Medical News Today’s bondage overview (safety prep, boundaries, safewords), Healthline’s BDSM basics, and specialist rope resources on nerves and first‑aid.

Frequently Asked Questions
Is self bondage safe?
It’s riskier than partnered bondage because no one can rescue you. Reduce risk by skipping breath play, avoiding face‑down/forward‑bent positions, learning nerve/circulation signs, using EMT shears, and layering at least one independent release. Start short and sober.
What are the best beginner self bondage ideas?
Floor‑based setups with Velcro cuffs (wrist‑in‑front), the “weighted‑blanket cocoon,” and a front‑bind chair are simple and stable. Add blindfold + audio if you want more intensity without more restraint
How long should a solo scene last?
There’s no universal time. Begin with short, timed sessions (think minutes, not hours), watch for circulation/nerve signals, and end sooner than you think. Mainstream safety pieces stress taking it easy and planning a time limit.
Are ice‑lock or timed releases okay?
They’re not a primary safety plan. If you use them, test extensively while unbound, then lightly bound—and still keep shears and a manual backup release in reach. Competitor and community articles frame timers as add‑ons, not guarantees.
What about self suspension?
Don’t. Rope educators flag suspension as high‑risk for nerve damage and falls even with a partner. Solo removes your safety net entirely.
Can I combine self BDSM with anal or prostate play?
Yes—externally focused, flared‑base toys only, with lots of lube and shallow, breathable positions (no chest compression). Keep your base outside the body and your hands free to remove it.
Where can I learn more beyond “self bondage videos”?
Read safety‑first resources: Medical News Today (bondage prep & shears), RopeStudy (nerve risk), Twisted Windows (solo safety), and UBC’s consent review. Use videos for inspiration, not instruction, and avoid creators who normalize risky stunts.
The Gentle Wrap‑Up
Self BDSM can be powerful precisely because you engineer the entire experience—anticipation, restraint, and release. Treat that control as a responsibility: two releases, no breath play, no solo suspension, and constant body checks. Start with floor‑based self bondage techniques, keep sessions short, and gradually layer sensation (audio, blindfolds, low‑power toys) once your safety plan is rock solid. If you enjoy internal pressure while staying hands‑free, consider a small flared‑base plug or a remote option from the prostate massagers collection (e.g., E‑Gale Wind Remote‑Controlled Prostate Massager)—then focus on breath and pacing.


Looking for something else?

Sex Positions from Behind: 8 Beyond Doggy Style
LEARN MORE
What Does a Vulva Taste Like? Facts & Myths Explained
LEARN MORE
Straddle Sex Position: 7 Variations & Tips
LEARN MORE
Mistress Slave Relationship in BDSM: Complete Guide
LEARN MORELooking for something else?

Sensual Domination: Guide to Affectionate Power Play
LEARN MORE
Best Prostate Massager for Beginners: Complete Guide
LEARN MORE
Dominant Sex Positions: 8 Power Positions & Tips
LEARN MOREYou may also like
20% off

20% off

20% off

20% off

20% off

20% off

Further reading
Automatic Male Masturbator vs Manual Stroker: Which Should You Buy?
11 Best Automatic Blowjob Machines for Men in 2026

Understanding Smoking Fetish: The Erotic Appeal of Cigarettes